Busy weeknights don’t have to mean stressful dinners! Spending quality time with family over a delicious meal is one of life’s simple joys, and with the right recipes, it can be effortless too. In this blog, we’re sharing five easy and flavorful dinner ideas that bring everyone together—without hours in the kitchen. From comforting classics to quick, nutritious options, these meals are perfect for making dinnertime stress-free and enjoyable. Let’s dive into these tasty, family-friendly recipes!
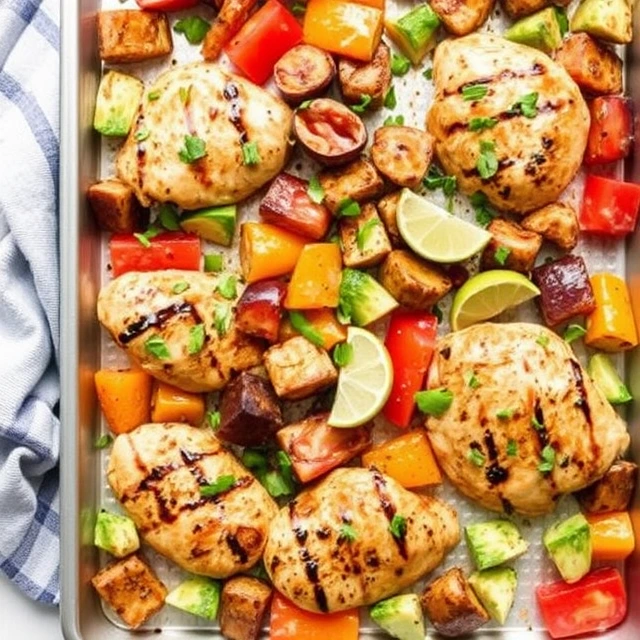
1. Sheet Pan Chicken Fajitas
Sheet Pan Chicken Fajitas are a game-changer for busy weeknights. This one-pan wonder combines tender chicken strips with vibrant bell peppers and onions, all seasoned to perfection and roasted together. The result is a flavorful, fuss-free meal that minimizes cleanup without compromising on taste. Whether you’re feeding a family or meal-prepping for the week, these fajitas offer a delicious and efficient solution to dinnertime dilemmas.
Time:
- Prep Time: 20 minutes
- Cook Time: 25 minutes
- Total Time: 45 minutes
Servings: 4
Ingredients:
- 1½ pounds boneless, skinless chicken breasts, cut into thin strips
- 1 red bell pepper, sliced into strips
- 1 yellow bell pepper, sliced into strips
- 1 orange bell pepper, sliced into strips
- 1 red onion, cut into wedges
- 3 cloves garlic, minced
- 3 tablespoons olive oil
- 2 teaspoons chili powder
- 2 teaspoons ground cumin
- 2 teaspoons dried oregano
- 1 teaspoon smoked paprika
- Salt and freshly ground black pepper, to taste
- ¼ cup fresh cilantro, chopped
- 2 tablespoons fresh lime juice
- 8 small flour or corn tortillas, warmed
Instructions:
- Preheat the Oven: Set your oven to 425°F (220°C). Lightly grease a large baking sheet or line it with parchment paper for easier cleanup.
- Prepare the Seasoning Mix: In a small bowl, combine the chili powder, ground cumin, dried oregano, smoked paprika, salt, and black pepper. Mix well to ensure an even distribution of spices.
- Assemble the Ingredients: On the prepared baking sheet, arrange the chicken strips, sliced bell peppers, red onion wedges, and minced garlic in a single layer. Drizzle the olive oil over the top.
- Season the Mixture: Sprinkle the seasoning mix evenly over the chicken and vegetables. Using your hands or a spatula, toss everything together directly on the baking sheet until all pieces are well-coated with oil and spices.
- Bake: Place the baking sheet in the preheated oven and bake for 25 minutes, or until the chicken is cooked through and the vegetables are tender yet still crisp. Stir halfway through the cooking time to promote even roasting.
- Add Fresh Flavors: Once out of the oven, sprinkle the chopped cilantro over the fajita mixture and drizzle with fresh lime juice. Toss gently to combine, allowing the residual heat to meld the flavors.
- Serve: Transfer the chicken and vegetable mixture to a serving platter. Serve immediately with warmed tortillas on the side. Encourage diners to fill their tortillas with the fajita mixture and add optional toppings as desired.
Optional Toppings:
- Shredded Monterey Jack or cheddar cheese
- Guacamole or sliced avocados
- Sour cream
- Salsa or pico de gallo
- Fresh jalapeño slices
- Additional lime wedges
Nutritional Information (per serving):
- Calories: 400
- Protein: 35g
- Carbohydrates: 35g
- Dietary Fiber: 5g
- Sugars: 6g
- Total Fat: 14g
- Saturated Fat: 3g
- Cholesterol: 95mg
- Sodium: 800mg
- Potassium: 950mg
Tips for Success:
- Uniform Slicing: Ensure that the chicken and vegetables are sliced uniformly to promote even cooking.
- High-Quality Spices: Using fresh, high-quality spices will enhance the overall flavor of the dish.
- Sheet Pan Selection: A sturdy, rimmed baking sheet prevents spills and allows for better roasting.
- Warming Tortillas: Warm tortillas in the oven wrapped in foil during the last 5 minutes of cooking, or heat them individually in a dry skillet over medium heat until pliable.
- Storage and Reheating: Store any leftovers in an airtight container in the refrigerator for up to 3 days. Reheat in a skillet over medium heat until warmed through.
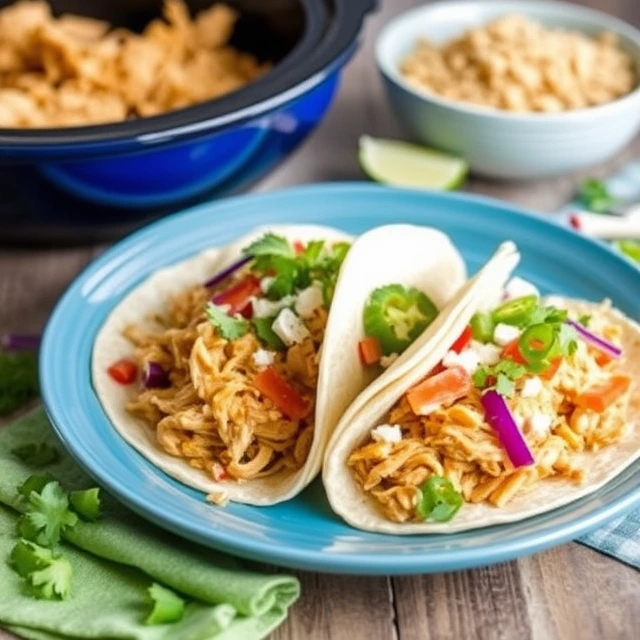
2. Fiesta Slow Cooker Shredded Chicken Tacos
Fiesta Slow Cooker Shredded Chicken Tacos are a delightful and effortless way to bring vibrant Mexican flavors to your dinner table. By utilizing a slow cooker, this recipe ensures tender, juicy shredded chicken infused with zesty spices, making it perfect for busy individuals seeking a delicious meal with minimal hands-on time. Whether you’re hosting a gathering or preparing a family dinner, these tacos are sure to be a hit, offering a fiesta of flavors in every bite.
Time:
- Prep Time: 10 minutes
- Cook Time: 6 hours
- Total Time: 6 hours 10 minutes
Servings: 8
Ingredients:
- 1 cup chicken broth
- 3 tablespoons taco seasoning mix
- 1 pound skinless, boneless chicken breasts
- 8 small flour tortillas, warmed
Optional Toppings:
- Shredded lettuce
- Chopped tomatoes
- Diced onions
- Sliced avocados
- Shredded cheese
- Sour cream
- Fresh cilantro
- Lime wedges
Instructions:
- Prepare the Cooking Liquid: In a medium bowl, whisk together the chicken broth and taco seasoning mix until thoroughly combined.
- Arrange the Chicken: Place the chicken breasts in the bottom of your slow cooker, ensuring they are evenly spaced.
- Add the Seasoned Broth: Pour the seasoned chicken broth mixture over the chicken breasts, ensuring they are fully submerged.
- Slow Cook: Cover the slow cooker with its lid and set it to cook on the Low setting for 6 to 8 hours, or until the chicken is tender and easily shreds with a fork.
- Shred the Chicken: Once the cooking time is complete, carefully remove the chicken breasts from the slow cooker and place them on a cutting board. Use two forks to shred the chicken into bite-sized pieces.
- Combine with Cooking Juices: Return the shredded chicken to the slow cooker, stirring it into the remaining cooking juices to ensure it is moist and flavorful. Allow it to sit on the Warm setting for an additional 10 minutes to absorb the flavors.
- Assemble the Tacos: Lay out the warmed tortillas and spoon a generous portion of the Fiesta slow cooker shredded chicken onto each. Add your preferred toppings to customize your tacos to your liking.
- Serve: Present the assembled tacos immediately, accompanied by lime wedges for an extra burst of freshness.
Nutritional Information (per serving):
- Calories: 71
- Total Fat: 1g
- Saturated Fat: 0g
- Cholesterol: 30mg
- Sodium: 415mg
- Total Carbohydrates: 2g
- Dietary Fiber: 0g
- Sugars: 1g
- Protein: 11g
Tips for Success:
- Taco Seasoning: For a personalized touch, consider using homemade taco seasoning to control the spice levels and ingredients.
- Salsa Addition: Incorporating a cup of your favorite salsa into the slow cooker can enhance the flavor profile and add a pleasant kick to the shredded chicken.
- Tortilla Warming: To prevent tortillas from tearing, warm them in a dry skillet over medium heat for about 30 seconds on each side or wrap them in a damp paper towel and microwave for 20-30 seconds.
- Storage and Reheating: Store any leftover Fiesta slow cooker shredded chicken in an airtight container in the refrigerator for up to 3 days. Reheat gently in the microwave or on the stovetop until warmed through.
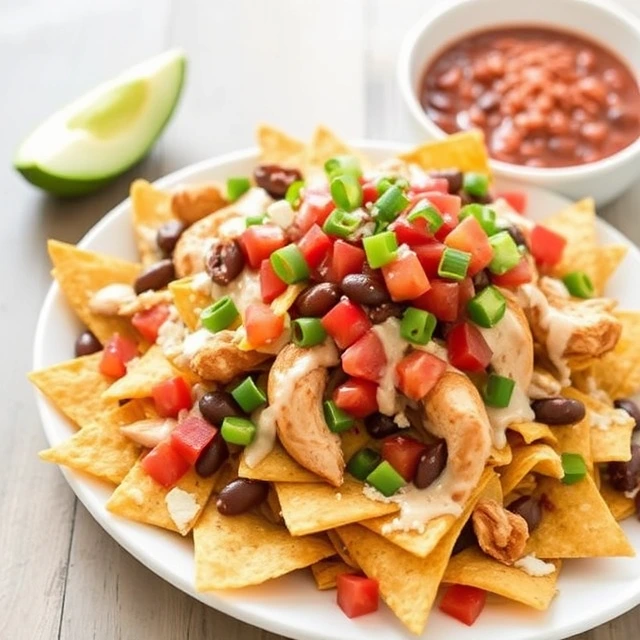
3. Chicken Nachos with Refried Beans
Chicken Nachos with Refried Beans are a delightful fusion of crispy tortilla chips, savory refried beans, tender chicken, and melted cheese, creating a satisfying appetizer or main course. This dish is perfect for gatherings, game nights, or a casual family dinner, offering layers of flavor and texture in every bite. Easy to prepare and customizable with your favorite toppings, these nachos are sure to become a household favorite.
Time:
- Prep Time: 10 minutes
- Cook Time: 10 minutes
- Total Time: 20 minutes
Servings: 8
Ingredients:
- 1 (14.5-ounce) package tortilla chips
- 1 (16-ounce) can refried beans
- 2 cooked skinless, boneless chicken breast halves, cut into bite-sized pieces
- 1 cup canned jalapeño pepper slices
- 12 ounces shredded Cheddar cheese
Instructions:
- Preheat the Oven: Set your oven to 350°F (175°C). Line a large rimmed baking sheet with parchment paper for easy cleanup.
- Arrange the Tortilla Chips: Spread the tortilla chips evenly across the prepared baking sheet, ensuring they are in a single layer to allow for even topping distribution.
- Layer the Refried Beans: Gently spread the refried beans over the tortilla chips. To make spreading easier, you can warm the beans slightly in the microwave or on the stovetop until they are more pliable.
- Add the Chicken and Jalapeños: Distribute the bite-sized chicken pieces evenly over the layer of refried beans. Sprinkle the canned jalapeño slices on top, adjusting the quantity to suit your preferred level of spiciness.
- Top with Cheese: Generously sprinkle the shredded Cheddar cheese over the entire nacho assembly, ensuring even coverage for optimal melting.
- Bake: Place the baking sheet in the preheated oven and bake for approximately 6 minutes, or until the cheese is fully melted and bubbly. Keep a close eye to prevent overcooking.
- Serve Immediately: Once the cheese has melted, remove the nachos from the oven. Serve hot, optionally garnished with your favorite toppings such as sour cream, guacamole, diced tomatoes, or chopped cilantro.
Nutritional Information (per serving):
- Calories: 521
- Total Fat: 29g
- Saturated Fat: 11g
- Cholesterol: 67mg
- Sodium: 944mg
- Total Carbohydrates: 43g
- Dietary Fiber: 6g
- Sugars: 1g
- Protein: 24g
Tips for Success:
- Chicken Preparation: For convenience, use leftover cooked chicken or a store-bought rotisserie chicken. Shred or dice the meat into small pieces for even distribution.
- Refried Beans: If the refried beans are too thick to spread easily, warm them slightly to achieve a smoother consistency. This will make layering over the chips more manageable.
- Cheese Selection: While Cheddar cheese is traditional, feel free to experiment with other melting cheeses such as Monterey Jack, Colby, or a Mexican cheese blend to suit your taste preferences.
- Topping Variations: Customize your Chicken Nachos with Refried Beans by adding toppings like black olives, green onions, diced red onions, or fresh jalapeño slices. Serving with sides of salsa, guacamole, or pico de gallo can also enhance the flavor.
- Serving Suggestions: For a party or gathering, consider setting up a nacho bar where guests can assemble their own nachos with a variety of toppings and sauces.
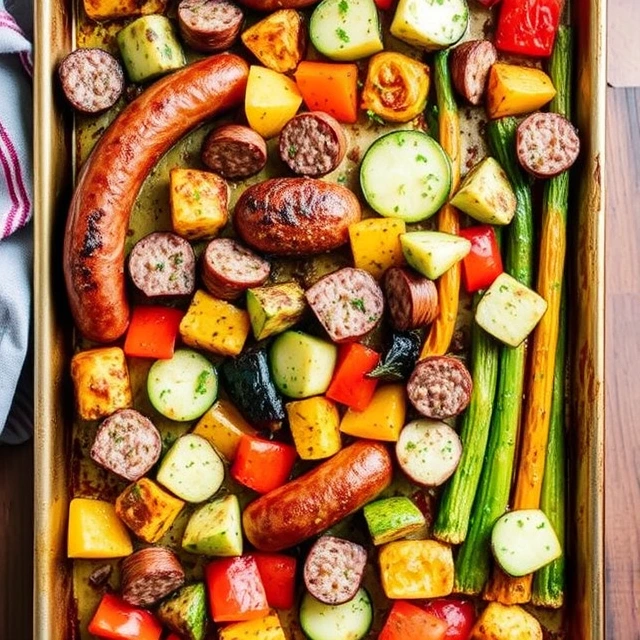
4. Roasted Sausage and Vegetables Sheet Pan Dinner
A Roasted Sausage and Vegetables Sheet Pan Dinner is a simple yet flavorful meal that brings together savory sausages and a medley of roasted vegetables, all cooked on a single sheet pan. This fuss-free recipe is perfect for busy weeknights, offering a balanced and hearty dish with minimal cleanup. The combination of seasoned vegetables and juicy sausages creates a satisfying dinner that the whole family will enjoy.
Time:
- Prep Time: 20 minutes
- Cook Time: 30 minutes
- Total Time: 50 minutes
Servings: 4
Ingredients:
- 1 large head broccoli, cut into florets
- 10 ounces baby potatoes, halved
- 1 large carrot, sliced
- ½ red onion, roughly chopped
- 3 tablespoons olive oil
- 2 tablespoons whole grain mustard
- 2 tablespoons grated Pecorino Romano cheese
- 1 teaspoon dried thyme
- ½ teaspoon dried oregano
- Salt and ground black pepper to taste
- 4 mild Italian sausage links
Instructions:
- Preheat the Oven: Set your oven to 400°F (200°C).
- Prepare the Vegetables: In a large bowl, combine the broccoli florets, halved baby potatoes, sliced carrot, and chopped red onion.
- Season the Vegetables: In a small bowl, whisk together the olive oil, whole grain mustard, grated Pecorino Romano cheese, dried thyme, dried oregano, salt, and ground black pepper. Pour this mixture over the vegetables and toss until they are evenly coated.
- Arrange on Sheet Pan: Spread the seasoned vegetables in an even layer on a large rimmed baking sheet.
- Add the Sausages: Place the Italian sausage links among the vegetables, ensuring they make contact with the baking sheet for optimal browning.
- Roast: Place the baking sheet in the preheated oven and roast for 30 to 35 minutes, flipping the sausages and stirring the vegetables halfway through the cooking time. The dish is ready when the sausages are cooked through and the vegetables are tender and caramelized.
- Serve: Remove from the oven and serve the Roasted Sausage and Vegetables Sheet Pan Dinner hot.
Nutritional Information (per serving):
- Calories: 476
- Total Fat: 33g
- Saturated Fat: 10g
- Cholesterol: 48mg
- Sodium: 1164mg
- Total Carbohydrates: 25g
- Dietary Fiber: 5g
- Total Sugars: 4g
- Protein: 21g
Tips for Success:
- Vegetable Uniformity: Cut the vegetables into similar sizes to ensure even roasting.
- Sausage Selection: Feel free to use your preferred type of sausage, such as spicy Italian, chorizo, or chicken sausage, to suit your taste preferences.
- Sheet Pan Size: Ensure the vegetables and sausages are spread out in a single layer on the sheet pan to promote proper roasting and prevent steaming.
- Flavor Variations: Experiment with different herbs and spices, such as rosemary, paprika, or garlic powder, to add variety to the dish.
- Serving Suggestions: Pair the Roasted Sausage and Vegetables Sheet Pan Dinner with crusty bread or a simple green salad for a complete meal.
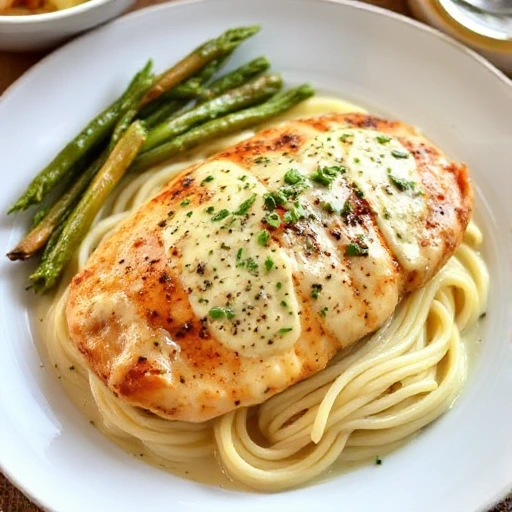
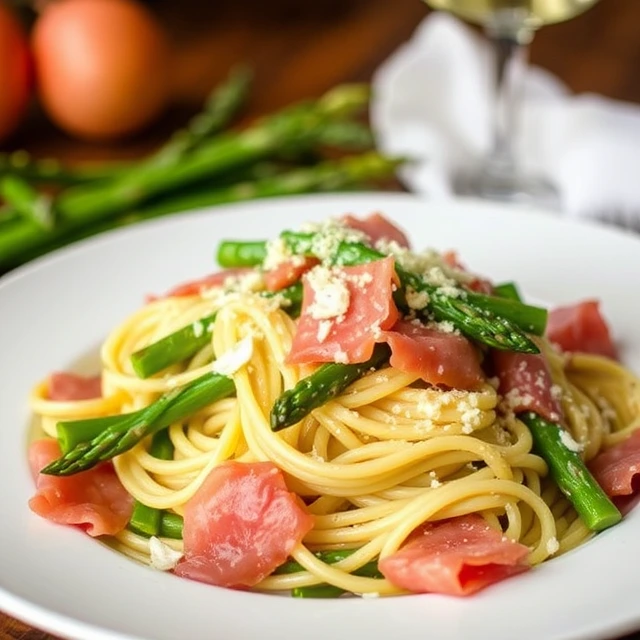
5. Prosciutto and Asparagus Pasta
If you’re looking for a restaurant-quality meal that comes together in under 40 minutes, this Prosciutto and Asparagus Pasta is a perfect choice. This dish combines crispy prosciutto, tender asparagus, and al dente pasta in a light yet flavorful sauce made with garlic, Parmesan, and lemon. It’s a simple yet elegant dish that’s perfect for a weeknight dinner or a special occasion.
Time:
- Prep Time: 15 minutes
- Cook Time: 20 minutes
- Total Time: 35 minutes
Servings: 4
Ingredients:
- 12 ounces pasta (fettuccine, linguine, or spaghetti)
- 1 pound asparagus, trimmed and cut into 1-inch pieces
- 4 ounces prosciutto, sliced into thin strips
- 3 tablespoons olive oil
- 3 cloves garlic, minced
- ½ teaspoon red pepper flakes (optional)
- ½ cup dry white wine or chicken broth
- Zest and juice of 1 lemon
- ½ cup grated Parmesan cheese
- Salt and freshly ground black pepper, to taste
- ¼ cup fresh parsley or basil, chopped (for garnish)
Instructions:
Step 1: Cook the Pasta and Asparagus
- Bring a large pot of salted water to a boil. Add the pasta and cook according to the package instructions until al dente.
- Two minutes before the pasta is done, add the asparagus to the boiling water.
- Reserve ½ cup of pasta water before draining the pasta and asparagus. Set aside.
Step 2: Crisp the Prosciutto
- Heat 1 tablespoon of olive oil in a large skillet over medium heat.
- Add the prosciutto strips and cook for 2-3 minutes, stirring occasionally, until crispy.
- Remove the prosciutto from the skillet and set aside on a paper towel-lined plate.
Step 3: Sauté Garlic and Red Pepper Flakes
- In the same skillet, add the remaining olive oil.
- Add minced garlic and red pepper flakes (if using) and sauté for about 30 seconds until fragrant.
Step 4: Make the Sauce
- Pour in the white wine (or chicken broth) to deglaze the pan, scraping up any browned bits.
- Let it simmer for about 2 minutes until slightly reduced.
- Stir in the lemon zest and juice for a fresh, tangy flavor.
Step 5: Combine Everything
- Return the cooked pasta and asparagus to the skillet.
- Toss everything together, adding a splash of reserved pasta water if needed to loosen the sauce.
- Stir in grated Parmesan cheese until melted and well combined.
Step 6: Add the Crispy Prosciutto
- Sprinkle the crispy prosciutto over the pasta and toss gently.
- Season with salt and black pepper to taste.
- Garnish with chopped parsley or basil for a burst of freshness.
Nutritional Information (Per Serving):
- Calories: 450
- Protein: 18g
- Carbohydrates: 55g
- Fiber: 5g
- Fat: 16g
- Saturated Fat: 5g
- Cholesterol: 30mg
- Sodium: 720mg
Tips for the Best Prosciutto and Asparagus Pasta:
- Choose fresh asparagus: Look for bright green, firm stalks with tight tips for the best flavor and texture.
- Don’t overcook the asparagus: Adding it to the pasta water for the last 2 minutes ensures it stays crisp-tender.
- Use high-quality Parmesan: Freshly grated Parmesan melts better and adds a richer flavor.
- Balance the flavors: The saltiness of prosciutto pairs perfectly with the bright lemon and the umami-rich Parmesan.
- Make it creamy: If you prefer a creamier sauce, add ¼ cup of heavy cream before adding the pasta.